My artichoke plant multiplied like crazy, it had a lot of baby plants and I decided to split them. It was hard to figure out exactly how many they were until I split them, I ended up with 10 different plants. I left 2 in the same spot, transplanted 5 in the ground and 3 in pots. Some of them had nice roots, others just a small root or none. I transplanted the ones that didn’t look so good in pots.
I don’t have much space in the garden, so I decided to transplant the artichoke between my mint, they don’t get much sun in that area, but I hope it won’t affect the plants too much.
Artichoke
I planted more radishes in the space were I use to have the eggplants.
Radishes
I didn’t have enough garlic to fill the entire area when I planted the garlic a month ago, so I got some more garlic and planted it. It’s a different variety than the first one. Both of them were bought from the grocery store, grown in California, but I don’t know the variety.
I also planted mare spinach seeds, since not all the seeds I planted a month ago germinated. This is 3rd round of spinach seeds … fingers crossed!
The squirrels are staring to prepare for winter and are hiding nuts in my garden. They messed up one of my broccoli plants and the arugula 3 times in one week! I had to transplant the broccoli plant 3 times and it’s still alive 🙂
In the month of October, I continued planting the cool season vegetables: onions, cauliflower, broccoli, lettuce, arugula, carrots, spinach, Fava beans and peas.
I also transplanted the sequoia strawberries in a bigger container. The small plant purchased last year multiplied and I had to move it into a bigger container. I transplanted 6 plants in a big rectangle container.
Strawberries in original pot
New container
Sequoia strawberries transplanted
I removed most of the remaining basil plants and amended the soil with steer manure. Afterwards I prepared the rows and planted the lettuce, arugula and spinach seeds. I also planted yellow onion bulbs and transplanted the broccoli and cauliflower seedlings.
Garden bed
Garden bed after I removed the basil plants
Steer manure
I mixed the steer manure with the soil
Onion
Cauliflower seedlings
Broccoli seedlings
Lettuce
Arugula
Spinach
Another project was to remove the weeds from another space in my garden where I had the summer squash and zucchini and plant cool season plants. I amended the soil with steer manure and planted carrots, arugula, radishes and Fava beans.
Prepared the space
Added steer manure
Mixed the steer manure with the soil
I soaked the Fava beans in water for 24 hours before planting
Planted the Fava beans
Rows for carrots, radishes and arugula
The last project was to plant the peas in 5 gallon pots. They are growing very fast: they spouted in 1 week and 3 days later they were already around 4-5″ tall.
During the second half of September, we had a few days with temperatures in the 80s and I was able to do some work in the garden. I had to relocate mature plants to make space for the cool season plants. I didn’t want to be late with my cool season plants like last year, so I decided to start early.
One of the tomato plants was getting infested again with a lot of spider mites. The spider mites love the heat and low humidity weather that we’ve had lately and they multiplied fast. I removed most of the leaves and sprayed the plant again with neem oil.
Tomato plant with spider mites
Same plant after I removed the majority of the leaves
The cucumber plants that were in the ground stopped producing fruits for some time. So I decided to remove them to allow more sun to get to the peppers and eggplants.
Before
After
In order to make space for the cool plants in the garden beds, I removed and relocated a few mature plants. I removed the celery, arugula and strawberry plants from the garden bed where the big tomato plant is. I purchased a new type of garden soil, Amend from Kellogg, and I mixed it into the existing soil. Afterwards, I planted parsnip, carrots, beets, onions and radishes.
Because my seedlings are not ready to be transplanted outside yet, I purchased 6 seedlings of purple broccoli and transplanted them in the same garden bed.
Celery
Amend
A layer of Amend on top of the soil
Amend mixed with the soil
Holes ready for seeds
Parsnip
Carrots
Onions
Purple broccoli
I used the homemade compost in another garden bed. Because it was enough to cover only about 75% of the space, I will use planting mix and manure for the other 25%.
Compost
Garden bed with homemade compost
Relocate mature plants
Last year I compromised my cool season plants because I didn’t remove or relocate mature plants and I planted the cool season crop between a few leftover plants from the warm season. Another mistake was that I transplanted seedlings too late in the fall. Hence this year I decided to do it right and start fresh with my garden beds and a little earlier.
Relocate strawberries
As space is always a problem in my garden, I was planing to relocate the strawberry plants in pots. But after I read an article on Greg Alder’s blog in which he had transplanted strawberries next to the fruit trees, I got inspired to do it the same way.
First I prepared the new location next to my apple tree, by removing the layer of wood chips. Afterwards I watered the place a few times to be sure the water gets at least 4″ deep and made holes for the strawberry plants to go in.
Next I removed the plants from the old location and cut all the runners to have only individual plants and placed them in holes in the new location.
New location
Watered well before transplanting
Holes for the plants to go in
Strawberries to be relocated
Removing the strawberries
Individual plants after removing the runners
Strawberries in the new location
Extra plants placed in water
Next to the strawberries I had a few arugula plants that needed to be relocated also. I decided to move them into the other bed with homemade compost. I also watered the new location until the water got at least 4″ deep into the soil, and then I relocated the arugula plants.
Old location
New location
Relocate parsley
Because I moved my blackberry plants from the 5 gallon pots into bigger ones, I also had to relocate the parsley plants. As a result of that, I moved them next to the arugula plants as the space was already prepared.
Old location
Parsley
New location
Transplanting blackberry
I created the new potting mix needed to transplant the blackberry plants. In order to do that I took the old potting mix from the parsley plants and mixed it with bark, peat moss, perlite, fertilizer and garden lime. The experiment with the potting mix tried during the quarantine wasn’t successful, so now that I could get all the ingredients, I did it by the original recipe.
In the beginning of the month, when we had the record heat wave, I moved the blackberry plants in the shade next to some trees. And surprise, all the tips the touched the soil developed roots. I cut them and placed them in 4″ pots, hopefully I will get more plants by next year.
Old potting mix
Ingredients for the new mix
Rooted blackberry tips
Cuttings from the tips
Blackberry
Transplanted in box
I decide to transplant the other Blackberry plant directly into the ground, so I can see if it will be a difference between the plants next season.
Blackberry plant transplanted in the ground
Transplanting raspberry
A friend planted a few raspberry plants last year and he harvested a lot of fruits this year. Since my kids love to eat berries, I want to give it a try. The variety that I found is called Willamette.
Next year I should have strawberries, blackberries, blueberries and raspberries if everything goes well. We’re all looking forward to it!
Raspberry
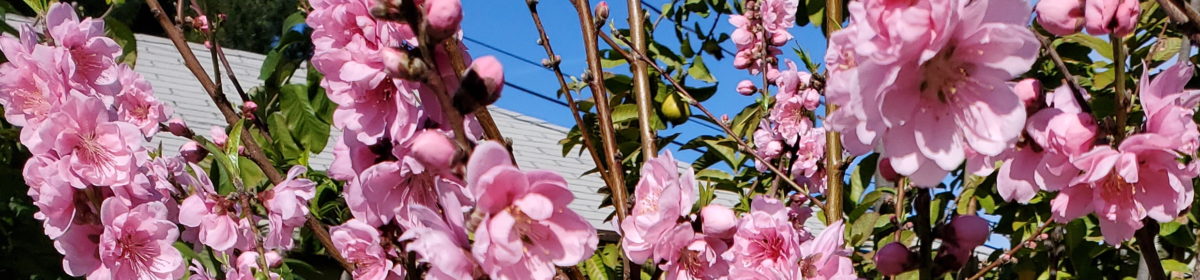
Another project was to fertilize the papaya, dragon fruit and artichoke plants. I finally found some chicken manure at Armstrong gardens.
Papaya
Dragon fruit
Artichoke
This month I tried for the first time the air layering of cherimoya and fig trees, hopefully I will have positive results in a month or two.
This month I removed 2 of my best producing tomato plants of the season: the red cherry tomato and the 2nd year beefsteak tomato plant. I harvested 779 cherry tomatoes weighting 20.5 lbs and 161 beefsteak tomatoes weighting 46.5 lbs.
We had a few heat waves and I was afraid I will lose the 10 feet tall cherry tomato plant due to the heat, so I ended up watering it too much. I think I accidentally drowned it.
I cut the beefsteak tomato almost all the way down and left just a little bit in case it will decide to give new growth for a 3rd year.
Cherry tomato
Cherry tomato roots
2nd year beefsteak tomato
An unwanted visitor (tomato horn worm)
The seeds from the radish plants that I pulled out in second part of July were ready to be removed from the pods.
Dry radish plant
Radish seed pods
Radish seeds
The dragon fruit started having a lot of flowers recently and I pollinated about 30 flowers in 3 days. This year I started collecting the pollen in a small container and used it to pollinate other flowers. I store it in the freezer between pollination sessions for the next wave of dragon fruit flowers. This technique was suggested by the local gardening group and it improved my success rate immensely. I have been using the same pollination technique for the cherimoya trees for the past few years.
The flowers open only during the night time and stay open just for a few hours. They must be hand pollinated during the night time, between 10 PM and 12 AM.
Dragon fruit flowers at night
Dragon fruit flowers in the morning
I moved the pots with 2nd generation of cucumbers from the temporary location next to the avocado tree and dragon fruit because they were getting too big.
Cucumbers in pots
We were lucky to have a lot fruit from our fig trees this year. I have been drying them using our dehydrator and I also made another round of jam. This time I mixed the figs with small peaches from our tree and this is by far, one of the most amazing jams I’ve made!
Fig and peach jam (in progress)
I harvested more peppers (Gogosari) than we could eat and made some pickled peppers, one of my favorites, so we can eat them during the off season. I also saved seeds from the peppers for the next year.
In the second part of the month of July I harvested the radish seeds. They were dry and ready to harvest.
This year I had a lot of celery plants that sprouted from last year’s plants seeds everywhere in my garden. I removed around 70% of the plants to make space for the next season plants. I pulled them out with the roots and gave to some neighbors to transplant them in their gardens.
Before
After
Celery with roots
The second year tomato plant was fully infested with spider mites. I removed most of the leaves and I will remove the plant in a week or two. I want to wait for a few of the bigger tomato to be ripe.
2nd year tomato before
2nd year tomato after
The figs started to ripe a few weeks earlier than last year. We dried most of them and also made jam twice. Second time we added some peaches to the fig jam.
Fig jam
I don’t have to worry about saving some cucumbers for seeds. Every time a few hide between leaves and I discover them when is already too late to be harvested. I leave them on the vine until they are ready to collect the seeds.
The main project of the day was to transplant peppers and eggplants. Below is the list with all the projects presented in today’s post.
Transplant peppers and eggplants
Split eggplant seedlings into individual pots
Relocate a few celery plants
Transplant basil plants next to my tomato plants
Transplant garlic
Plant radishes and bush beans
Transplant peppers and eggplants
Most of the seedlings are ready to be transplanted in the garden, but I currently have some winter vegetables that I would like to keep for a few more weeks. I had a location in my garden with radishes that did not do that well, so I removed them and transplanted 6 eggplants and 4 peppers in their place.
Pepper seedlingsEggplant seedlings
Split eggplant seedlings into individual pots
A few months ago, on February 15, I moved a few eggplant seedlings into 1 gallon pots, as you can see it in the seedlings update post. It was time to split them up into individual pots.
Relocate celery
In one of my tomato garden beds I have a lot of volunteer celery from last year’s plants seeds. I removed some and relocated them into another spot in my garden, between 2 old trees.
Transplant basil
Next project was to transplant basil into the tomato garden beds, because basil is a good companion plant to tomatoes. Same as the eggplants, I had 3 or 4 plants in each pot and I split them up before transplanting.
Transplant garlic
Last year I planted garlic and onion on the edges of my garden beds. I didn’t harvest all the garlic, so this year they spouted again in groups. I split them up and planted them between peppers and eggplants.
Planting radishes
I had a few pots that will be empty for another month, so I decided to plant radishes in them, since they should be ready to eat in 1 month. Because I had some extra space after removing the volunteer celery, I planted radishes there too.
Planting bush beans
While going through my seeds collection, I discovered a very old packet from 2012 with gold rush bush beans. Since their planting time in my zone is between March and August, I decided to give it a try. I planted them in 4 of my 5 gallon pots. Fingers crossed!
We are expecting 5 consecutive days of rain in a few days. I had some projects that needed to be finished before then:
find a place for the new grape vine that I received from a friend
transplant the last tomato seedlings
empty the barrels for rainwater collection
plant cucumbers and radishes
Below is a picture with my newest addition to the garden: a Kyoho grapevine that I received from a friend. My garden is almost full and the gravine needed a place with full sun, so I decided to place it next to the house. This is probably a temporary location for this year. I built a small wood structure with the materials that I already had, and which I plan to extend as needed.
The next project was to transplant the last 3 tomato seedlings. Below is a picture with one of them. They needed to be transplanted, because they were growing too big for their pots. I was trying to postpone the transplant because I have parsnip currently growing in the location where I wanted to put the tomatoes. I was hoping that I could delay it by another 2 weeks, but as you can see in the second picture, the roots were very close to be root bound.
This is the location that I had planed for my last 2 tomatoes seedlings. I removed 2 parsnip plants to make room for the tomatoes and probably will remove the other ones in 2-3 weeks.
Parsnip
In the picture below, if you look very carefully, you can see the new tomatoes. I bent the parsnip leafs for the tomatoes to get more sun.
I planted the last tomato in a 15 gallon container.
My plan for this year was to plant tomatoes only in the ground and have less than 20 plants total. But because of the coronavirus, I will plant a few in containers also, to have extra produce to share with neighbors and friends.
This is my rain water collection system. I emptied the barrels to make space for the next round of rain water.
The cucumbers that I transplanted in the garden a month ago have died because I transplanted them too early outside. We had very nice weather at the end of February, but in March it was raining a lot and it was cold during the night. Cucumbers need night temperatures of over 50. I planted new cucumbers seeds and I plan to keep them inside for now, because we will have another week with temperatures below 50.
I also tried to grow vegetables that grow faster, so we wouldn’t need to go often to the grocery store during the quarantine. I planted radishes wherever I saw an empty space, like between these peepers and eggplants.
My zucchini and summer squash were getting too big for the containers I had them in and they needed to be transplanted outside. I removed the radishes in the picture below to make space for zucchini.
I added half a bag of potting soil and mixed it into the ground.
I had 1 zucchini plant left and 4 summer squash. I planted the zucchini next to my other 2 zucchini plants that I transplanted a few weeks ago (bottom part of the picture).
I also planted radishes next to the zucchinis.
The next project was to add more potting soil to a grapevine that I got from a friend.
I prepared a mix using old soil from another pot, added two 5 gallon buckets of wood chips, one 5 gallon bucket of peat moss, half bucket of perlite and half bucket of steer manure.
I took the grapevine out of the pot and added the new mix at the bottom and sprinkled some starter fertilizer on top of it. I placed the plant on top of it and watered it.
Armstrong Garden was giving free strawberry plants with a purchase when I bought the ladybugs 2 weeks ago. I transplanted it into a bigger pot using the potting mix I just made.
My radishes and lettuce planted on January 11 as shown in this post were getting too big and overgrowing the peppers and eggplants. I removed all the radishes and most of the lettuce.
We made soup from the harvested lettuce.
I transplanted 2 peppers and 3 eggplants and filled up this garden bed.
harvest the radishes next to the cherry tomato and plant new ones.
transplant loquat trees into bigger pots
transplant a guava tree from the ground into pot
plant dill
I removed all the radishes that were growing next to the red cherry tomato plant and I planted a new variety.
I had a few loquat trees growing into small pots, but since I didn’t have space for them in the garden, I neglected them and they didn’t grow much. I recently saw a video about growing trees in containers and loquat and guava were among the trees that do well in containers, so I decided to give it a try.
I used the mix that I had left from the one that I prepared on March 7, as showed in this post, and transferred the loquats into 5 gallon pots.
I had a small guava tree growing right next to a pomegranate tree, but I could not let them grow that close to each other. Because of the space limitation in my garden, I moved the guava into a 5 gallon pot.
The dill that I planted in December didn’t do well, so I planted more seeds today.
Some of my seedlings were too big and I needed to transplant them in the garden. Firstly, I had to remove the radishes and carrots from the garden bed to make space for the new residents. After that, I started transplanting tomato seedlings and zucchinis.
Transplanting tomato seedlings
Below are the tomato seedlings that were too big to keep them in the red cups.
The tallest tomato seedling was over 18″ as shown in in the picture below.
Below is the space where I will plant my red cherry tomato seedling. On December 20th, as shown in this post, I added compost to feed the tomato plant throughout the season. All I will have to do from now on is to water it when needed.
I removed the radishes from the middle and made a hole around 6″ or 8″ deep.
Here are my starter fertilizer, epsom salt, earthworm castings and eggshell powder,I use them whenever I transplant seedlings in the garden. During the year, I save all the eggshell that we use in the kitchen and after I dry them, I grind them using an old coffee grinder.
I used 1/2 of the measure scoop of starter fertilizer, 1/2 scoop of eggshell powder 1/4 scoop of epsom salt. These are the quantities that I use for all my seedlings when I transplant them in the garden.
Starter fertilizerEggshell powderEpsom salt
After I remove the plant from the pot, I spread the roots and place it inside the hole.
I fill up the hole with a mix of planting mix and soil up to 2″ from the top and I place the earthworm castings
Afterwords I covered the earthworm castings with 1″ of soil and after that I filled up the whole with water.
I fill up the hole with water 3 or 4 times after the water gets into the ground to make sure it get all the way down to the roots.
The next project was to plant 6 more tomato seedlings in one of my garden beds where currently I have companion plants for tomato.
I prepared the holes in the garden bed and started transplanting tomato seedlings.
The red circles show the hard to spot transplanted tomato seedlings.
Transplanting zucchini seedlings
Afterwards it was time to also transplant the zucchini seedlings.
I made a big hole and mixed planting mix with chicken manure and soil.
After I filled up the big hole with the new mix, I made 2 smaller holes because form 3 zucchini plants 2 of them were in the same square. Then I added the starter fertilizer, eggshell powder and epsom salt.
I placed the seedlings in holes and covered them with soil.
In the next section I will post periodic updates about the cherry tomato plant and zucchini.
Cherry tomato updates:
The picture below shows the tomato plant on March 20, which is 3 weeks later.
The picture below was taken on March 30.
On April 14, only 2 weeks later, the tomato plant has more than doubled in size.
One week later on April 22, I had to reinstall the middle row of side wood to keep the plant inside the cage.
Eight days later, on April 30, the plant is already 6 ft tall, the nice weather that we had recently helps plants thriving.
Today is May 13 and I noticed that the tomatoes are starting to ripe, so It was time for another update.
May 22 – the pant is getting a lots of fruits and the cage starts to feel small.
May 27 – Today I had a crazy idea. Because the plants is over 8 ft tall and every year when it gets to this height it’s bending over the cage and it gets very hard to harvest the tomatoes in the middle of the cage. I decided to extend my tomato cage, form 6ft to 12ft.
May 30 – Now that I increased the cage size, I really want the plant to grow up to the top of the cage. I gave the tomato plant some homemade compost.
I made space for compost
Homemade compost
June 15 – the tomato is almost 10 ft tall and it’s producing a lot of tomatoes.
Zucchini updates:
The picture below is from April 20, the zucchinis are in bloom
The zucchini are growing nicely and soon will be ready to harvest. But today May 12, I notices some white spots on the leafs, powdery mildew, they get it every year. So, I prepared a copper fungicide solution and treated them, I also removed the contaminated leafs.